Learning Git - Chapter 2
Local Repositories
Introducing and Initializing a Local Repository
A repository (or a repo) is the container of a project version controlled by Git. There are two; local and remote. Local is stored on your computer, while remote is obviously hosted remotely (someone else’s computer).
GitHub is one of the largest platforms and the one I’m most familiar with. GitLab and Bitbucket also exist, but I haven’t used them myself. Chapter 6 onward deals with this; for now, we can worry about it later.
You can tell if a directory has a local repository if the folder has a hidden .git directory inside of it. Obviously, you won’t be able to see this unless you have hidden files viewable.
!!VERY IMPORTANT!! Don’t ever touch the files inside the .git folder. Just don’t.
To start your local repo, you could run the command git init. For this project however, we aren’t going to use that. We are going to add a branch option, -b, to specify it’s our initial branch, and pass along the name main. The book says we’ll go over why later.
Once ran, the .git directory should appear (or technically, not appear) in your folder. By default, you’ll have the following files, .config, description, and head, as well as the directories, /hooks, /info, /objects, and /refs. My local project also has a /branches directory.
The Areas of Git
We should introduce the areas within Git that we should be conscious of:
- Working Directory
- Staging Area
- Commit history
- Local repository
We already went over the local repository, so let’s keep moving through the list.
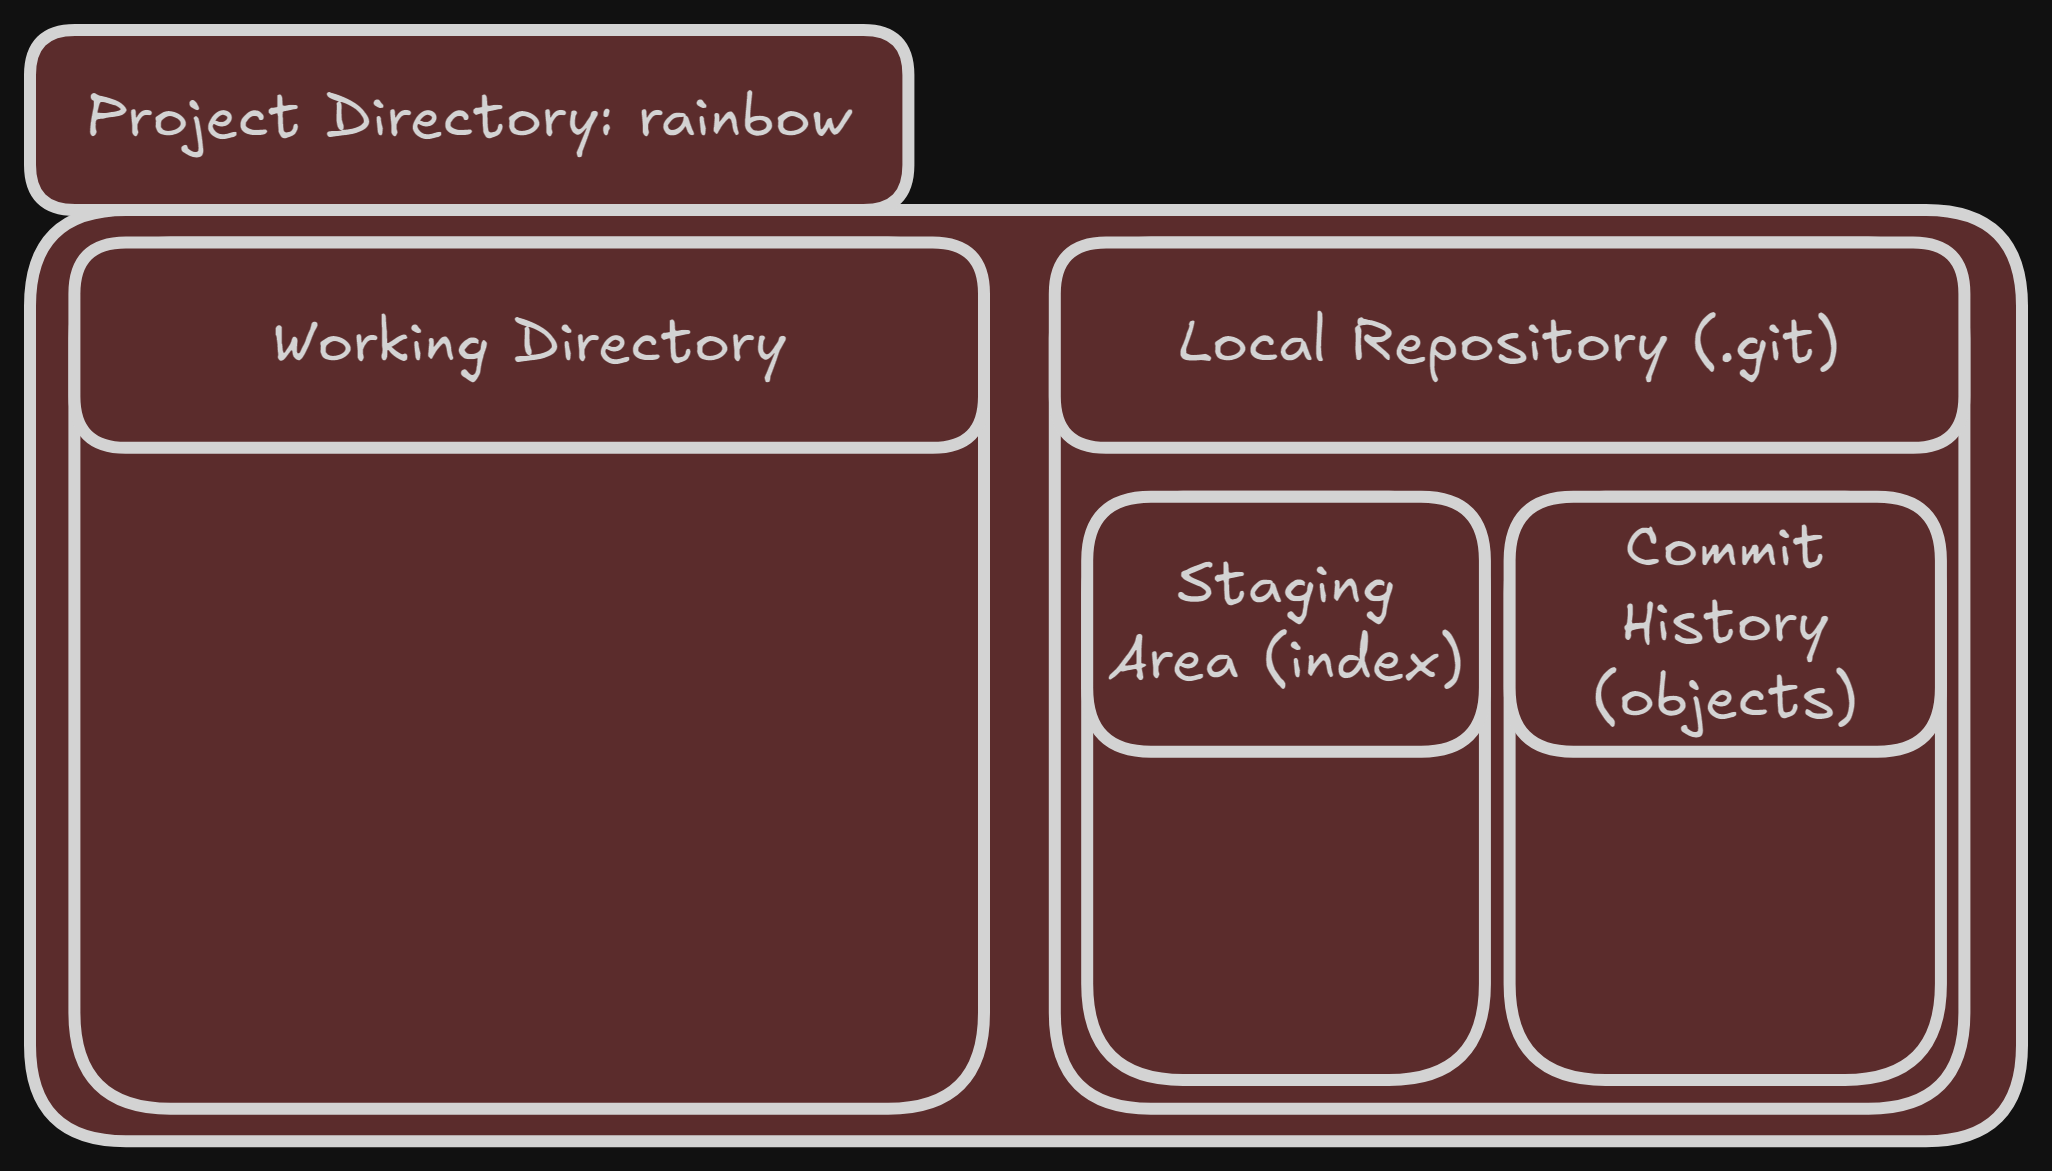
Working Directory: contains the files and directories in the project directory that represents one version of a project. Think of it like your work bench.
Book Project 2-1
Let’s go back to that book example we used in Chapter 1. If my book has 10 chapters, I have 10 corresponding text files: chapter_one.txt, chapter_two.txt and so on.
If I wanted to include these chapters into my project, you can create these files in the working directory. If there are any edits you want to make on the chapters, you’d have to edit the files within the working directory. Changes made elsewhere won’t get picked up. Same goes for deletion.
Staging Area: An area within the local repository that acts like a rough draft space. It’s a stage where you add or remove the files in prep for the next saved version of your project (aka commit). The physical representation of the staging area is a file in the .git directory named index.
Before we go into the commit history, let’s fully understand exactly what a commit is. A commit is essentially a version of a project; a freeze-frame of the project as it existed at a certain point in time.
Every commit has a unique 40 character identifier, called a commit hash. It contains letters and numbers (ex. 51dc6ecb327578cca503abba4a56e8c18f3835e1, or we can really just use the first seven characters, so 51dc6ec). Every commit is also unique, so the commits you see in the book will always be different than the ones you’ll encounter.
Commit History: the location of all of your commits. This exists physically in the directory /objects. This is a very complicated structure, so for now we don’t have to go into the nitty gritty.
We can now fully visualize the structure of our project:

Adding a File to a Git Project
We can start by simply creating a file within the /rainbow directory named rainbowcolors.txt. Add the sentence “Red is the first color of the rainbow.” and save the file. The rainbowcolors.txt is now within our Working Directory.
Currently, the file is untracked. This is just a file that Git is not currently version controlling. It is not currently apart of the repository. Once it gets added in a commit, it becomes a tracked file.
Next: Chapter 3